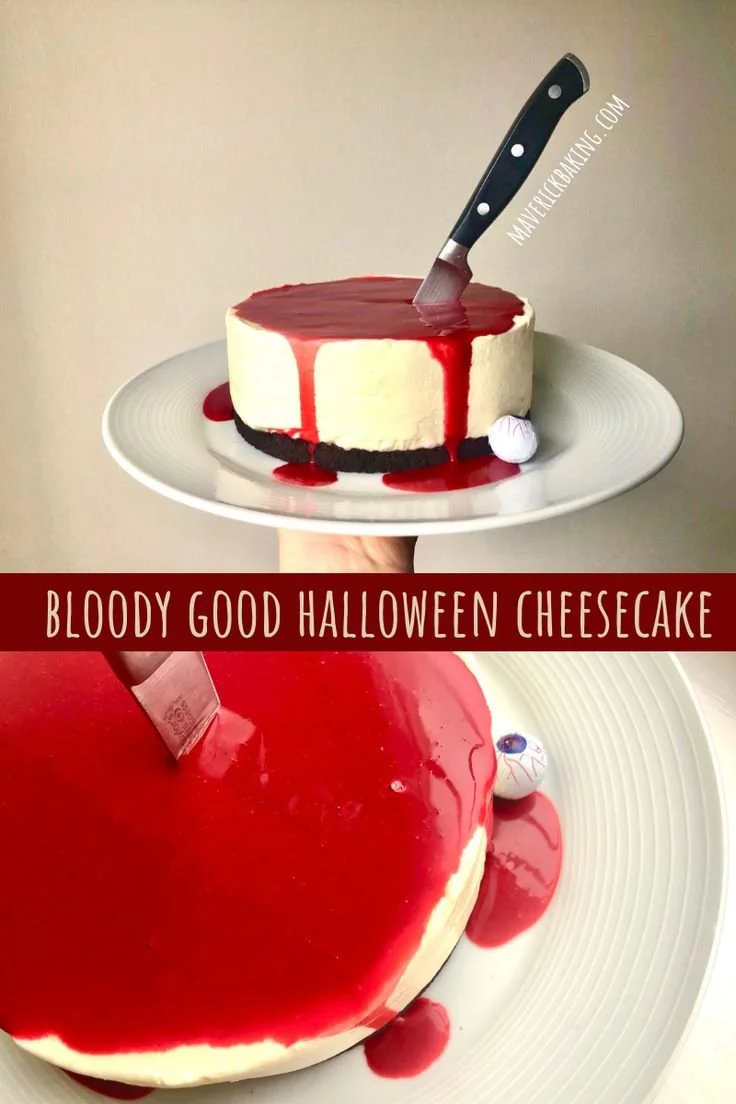
Indulging in a Bloody Good Halloween Cheesecake not only charms the festively spooky spirit but also offers an impressive dessert that’s easy to make and delightful to taste. This cheesecake features a decadent white chocolate filling atop a chocolate cookie base, all accented by a striking red drip. It’s perfect for gatherings, parties, or simply to treat yourself!
Why You’ll Love Bloody Good Halloween Cheesecake
- Eye-Catching Presentation: The vivid red drip creates a dramatic effect that is sure to draw attention at any Halloween gathering.
- Rich and Decadent Flavor: The combination of creamy white chocolate and tangy cream cheese provides a luscious taste that everyone will enjoy.
- Simple Preparation: With straightforward steps and common ingredients, even novice bakers can whip up this cheesecake with ease.
- Make-Ahead Friendly: This dessert can be prepared in advance, allowing you to save time for other Halloween festivities.
- Customizable Drip: You can play with the drip ingredients to adjust colors or flavors, making it fun to tailor to your event theme.
Recipe Overview
- Prep Time: 30 minutes
- Cook Time: 0 minutes (chill time only)
- Total Time: 2 hours 30 minutes (including chilling)
- Servings: 8-10
- Difficulty Level: Easy
Ingredients You’ll Need for Bloody Good Halloween Cheesecake
For the chocolate cookie base:
- 200g (7oz) Oreos
- 70g (5 tbsp) salted butter
For the white chocolate cheesecake:
- 200g (7 oz) white chocolate
- 600g (21 oz) full-fat cream cheese
- 1 tsp vanilla extract
- Juice of ½ a lemon
- Pinch of salt
- 300ml (1 ¼ cups) double cream
For the red drip:
- 150g (½ cup) condensed milk
- 1 tsp cocoa powder
- 1 tsp vanilla extract
- Red food coloring paste or gel
Note: Using full-fat cream cheese ensures a rich texture for the cheesecake. If you prefer a lighter version, you can use low-fat options, but the texture may vary.
How to Make Bloody Good Halloween Cheesecake
1. Prepare the Base
Start by lining a 23cm (8-inch) springform tin with a circle of greaseproof paper. This will help you remove the cheesecake easily later.
2. Make the Cookie Crust
In a food processor, blitz the Oreos into fine crumbs. If you don’t have a processor, place the Oreos in a freezer bag and crush them with a rolling pin until you achieve a coarse crumb consistency. Melt the butter in a small saucepan over low heat or in the microwave, then combine with the cookie crumbs. Mix until the texture is similar to wet sand. You may not need all the butter.
3. Press the Mixture
Transfer the crumb mixture to the prepared springform tin and press it down firmly to create an even base. Place it in the fridge to firm up for at least 30 minutes while you prepare the filling.
4. Prepare the Cheesecake Filling
Melt the white chocolate in a heatproof bowl either over a gently simmering pan of water or in the microwave, ensuring it is smooth and cool before use.
5. Combine Ingredients
In a large bowl, beat the cream cheese, vanilla extract, lemon juice, and a pinch of salt until the mixture is smooth and creamy. In another bowl, whip the double cream until stiff peaks form, then gently fold it into the cream cheese mixture. Finally, fold in the melted white chocolate until just combined.
6. Assemble the Cheesecake
Remove the tin from the fridge and pour the cheesecake mixture over the chilled cookie crust. Use a spatula to smooth the top as neatly as possible. Return the cheesecake to the fridge to chill for at least 2 hours, allowing it to firm up.
7. Prepare the Red Drip
In a medium bowl, whisk together the condensed milk, cocoa powder, vanilla extract, and enough red food coloring to achieve a vivid hue.
8. Drizzle and Serve
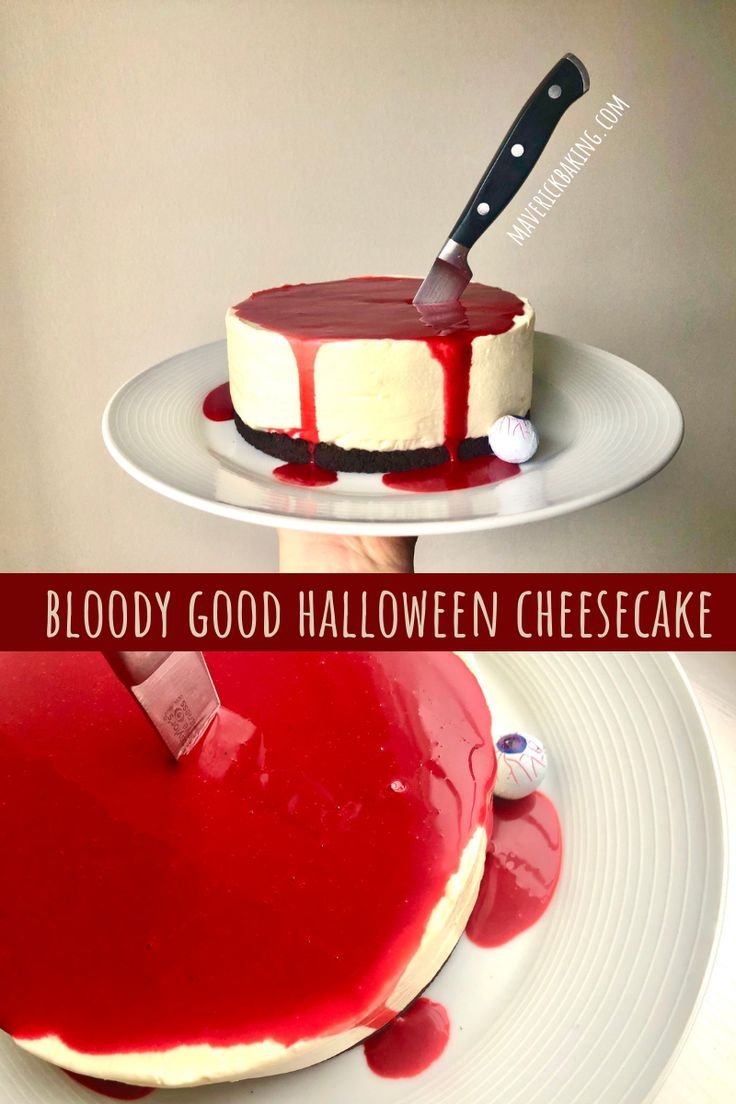
Once the cheesecake is set, carefully remove it from the springform tin and transfer it onto a serving plate. Spoon the red drip over the cheesecake, encouraging it to cascade down the sides. For an extra fun effect, stab a knife through the center of the cheesecake before serving. Enjoy your creation!
Tips for Success
- Chill Thoroughly: Ensure the cheesecake is well-set before attempting to remove it from the springform tin to avoid any collapses.
- Melt Chocolate Gently: Always melt the chocolate slowly to prevent it from seizing. Stir it well to keep its creamy consistency.
- Dollop Cream Wisely: When folding in the whipped cream, do it gently to retain the lightness of the texture.
- Use Food Coloring Carefully: Adjust the amount of food coloring based on your desired intensity in the red drip.
- Test for Firmness: If you’re unsure if the cheesecake is ready, gently shake the tin; it should have a slight jiggle but not be overly liquid.
Easy Variations
- Chocolate Drip: Replace the red coloring with melted dark or milk chocolate for a more traditional cheesecake look.
- Flavor Swap: Substitute the white chocolate for milk chocolate or even a flavored chocolate for a twist.
- Fruit Topping: Layer fresh berries or a mixed berry compote on top before adding the drip for a fruity complement.
- Nutty Crust: Mix in crushed nuts like almonds or hazelnuts with the Oreo crumbs for added texture in the crust.
- Mini Cheesecakes: Make individual servings by using muffin tins lined with cupcake liners instead of a springform tin.
What to Serve with Bloody Good Halloween Cheesecake
- Whipped Cream: Lightly sweetened whipped cream enhances the richness of the cheesecake.
- Fresh Berries: Raspberries or strawberries add a tart contrast that balances the sweetness.
- Ice Cream: Vanilla or even pumpkin spice ice cream complements the cheesecake beautifully.
- Chocolate Curls: Decorate with chocolate curls or shavings for added sophistication and crunch.
- Coffee: A warm cup of coffee or espresso pairs perfectly, highlighting the cheesecake’s flavors.
Storage and Reheating
- Refrigerator Storage: Store the cheesecake in an airtight container in the fridge, where it will keep well for up to 4 days.
- Freezer Storage: You can freeze the cheesecake before adding the drip. Wrap it tightly in plastic wrap and then aluminum foil, where it will last up to 3 months.
- Reheating Method: If desired, let the cheesecake thaw in the fridge overnight when ready to serve. Avoid reheating as this cheesecake is best enjoyed cold.
- Preserve Texture: To retain the creamy texture, consume it chilled after thawing as opposed to reheating.
Common Mistakes to Avoid
- Not Tempering Cream Cheese: Allow the cream cheese to reach room temperature before mixing to prevent lumps.
- Overmixing the Cream: Fold in the whipped cream just until combined. Overmixing can deflate it and make the cheesecake heavy.
- Skipping Chill Time: Don’t rush the chilling process; it’s essential for achieving a firm, sliceable cheesecake.
- Using Warm Ingredients: Ensure all components, especially the melted chocolate, are allowed to cool slightly so they don’t alter the integrity of the cheesecake.
Bloody Good Halloween Cheesecake: Background & Cultural Inspiration
Halloween treats often blend fun with fright, offering a playful take on food. Cheesecakes, in particular, are versatile desserts that can capture seasonal themes beautifully. This recipe draws inspiration from the classic idea of creative Halloween desserts and incorporates a luxurious twist with white chocolate and an eye-catching red drip. Celebrated worldwide, the notion of making themed foods for holidays has become a delightful tradition, and this cheesecake stands out as a striking centerpiece for your Halloween festivities.
Frequently Asked Questions
Can I make this cheesecake ahead of time?
Yes, you can prepare this cheesecake up to two days in advance. Assemble and chill it, then add the drip just before serving for maximum freshness.
What can I use instead of white chocolate?
If you’re not a fan of white chocolate, you can use a blend of cream cheese and melted milk chocolate instead, but the cheesecake will have a different flavor profile.
How do I store leftovers?
Store leftover cheesecake in an airtight container in the refrigerator for up to four days, or freeze for up to three months.
Can I use low-fat cream cheese?
You can use low-fat cream cheese, but the texture may not be as rich and creamy compared to full-fat cream cheese.
How can I avoid a soggy crust?
Make sure the butter is mixed with the Oreo crumbs until just moistened but not too wet. Press firmly to create a solid base; chilling it well before adding the cheesecake layer also helps maintain its structure.
Final Thoughts
The Bloody Good Halloween Cheesecake is not only visually striking but also incredibly satisfying in every bite. Its combination of flavors and textures makes it a crowd-pleaser, perfect for any Halloween gathering. Whether you’re hosting a party or making a festive treat for the family, this cheesecake is worth trying. Enjoy the process, and share the joy of this delightful dessert!
PrintBloody Good Halloween Cheesecake
A striking Halloween dessert featuring a creamy white chocolate filling and a spooky red drip, perfect for festive gatherings.
- Prep Time: 30 minutes
- Cook Time: 0 minutes
- Total Time: 150 minutes
- Yield: 8-10 servings
- Category: Dessert
- Method: Chilling
- Cuisine: American
Ingredients
- 200g (7oz) Oreos
- 70g (5 tbsp) salted butter
- 200g (7oz) white chocolate
- 600g (21oz) full-fat cream cheese
- 1 tsp vanilla extract
- Juice of ½ a lemon
- Pinch of salt
- 300ml (1 ¼ cups) double cream
- 150g (½ cup) condensed milk
- 1 tsp cocoa powder
- 1 tsp vanilla extract
- Red food coloring paste or gel
Instructions
- Prepare the Base by lining a 23cm (8-inch) springform tin with greaseproof paper.
- Make the Cookie Crust by blitzing Oreos into fine crumbs and combining them with melted butter.
- Press the crumb mixture into the tin and place it in the fridge for at least 30 minutes.
- Prepare the Cheesecake Filling by melting the white chocolate.
- Combine cream cheese, vanilla, lemon juice, and salt in a bowl until smooth.
- Fold in whipped double cream and melted white chocolate gently.
- Assemble the Cheesecake by pouring the filling over the crust and chilling for at least 2 hours.
- Prepare the Red Drip by whisking together condensed milk, cocoa powder, vanilla, and red food coloring.
- Drizzle the red drip over the cheesecake and serve.
Notes
Ensure the cheesecake is well-chilled before removing it from the tin to prevent collapsing. Melt chocolate gently to maintain creamy consistency.