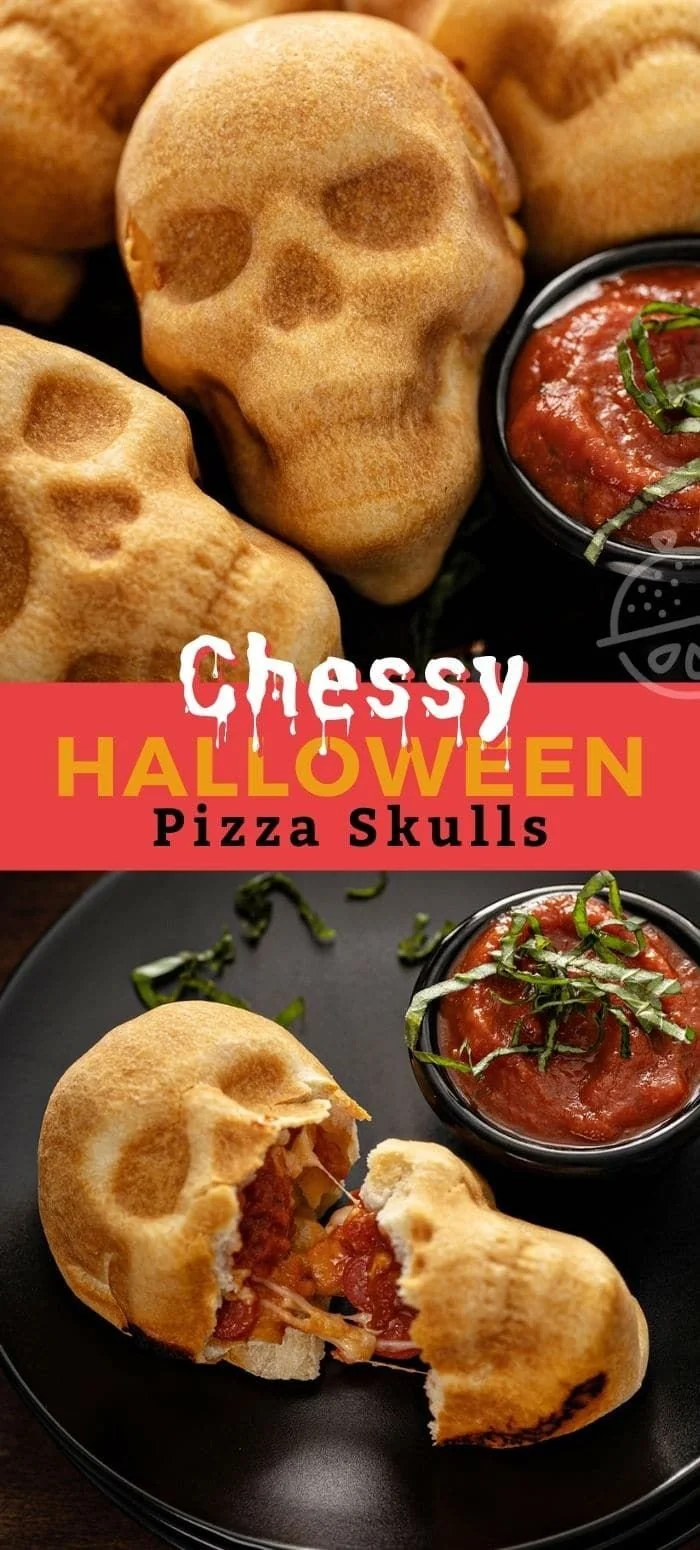
Spooky Pizza Skulls are a fun and creative twist on traditional pizza, perfect for a Halloween-themed gathering or a playful dinner. These deliciously cheesy, bite-sized snacks are both easy to make and sure to delight both kids and adults alike. Whether you’re looking to impress guests or just want to spice up your dinner routine, these playful treats are worth the effort!
Why You’ll Love Spooky Pizza Skulls
- Fun Presentation: These pizza skulls offer a spooky and playful presentation that adds excitement to any Halloween celebration.
- Customizable Fillings: You can customize the fillings to suit your family’s tastes, whether it’s pepperoni, veggies, or cheese.
- Perfect for Parties: They’re ideal for sharing, making these pizza skulls a great appetizer or party snack.
- Easy to Make: With simple ingredients and straightforward steps, even beginner cooks can enjoy making these.
- Comforting and Satisfying: Who doesn’t love a gooey, cheesy pizza? These bites are both comforting and filling, making them a hit for any occasion.
Recipe Overview
- Prep Time: 20 minutes
- Cook Time: 15 minutes
- Total Time: 35 minutes
- Servings: 12 skulls
- Difficulty Level: Easy
Ingredients You’ll Need for Spooky Pizza Skulls
- Pizza Dough: About 1 pound (store-bought or homemade)
- Pizza Sauce: 1 cup, your favorite kind
- Shredded Mozzarella Cheese: 2 cups, for gooey texture
- Pepperoni Slices: 1 cup, or any preferred protein like cooked chicken or sausage
- Olive Oil: 2 tablespoons, for brushing
- Flour: For dusting your work surface
- Salt and Pepper: To taste, if adding extra seasonings
Feel free to experiment with additional toppings like bell peppers or olives for extra flavor!

How to Make Spooky Pizza Skulls
-
Preheat the Oven: Preheat your oven to 400°F (200°C). Prepare a baking sheet by lining it with parchment paper.
-
Roll Out the Dough: On a floured surface, roll out the pizza dough to about ¼-inch thickness. Use a skull cookie cutter to cut out shapes, re-rolling the dough as needed.
-
Add the Filling: Place half of the skull shapes on the baking sheet. Spoon a small amount of pizza sauce in the center, sprinkle with shredded mozzarella, and add your desired protein. Leave a little space around the edges.
-
Seal the Skulls: Top each filled skull with the remaining cutouts. Gently press down the edges with your fingers to seal them. Use a fork to crimp the edges for a decorative touch.
-
Brush with Olive Oil: Lightly brush the tops of each skull with olive oil to promote browning and add flavor.
-
Bake Until Golden: Bake in the preheated oven for about 12-15 minutes, or until the skulls are golden brown and the cheese is melted.
-
Cool and Serve: Let the pizza skulls cool slightly before serving. They pair perfectly with extra pizza sauce for dipping.
Tips for Success
- Proper Sealing: Make sure to seal the edges well to prevent the cheese from leaking during baking.
- Don’t Overfill: Be cautious not to overfill the skulls; too much filling can cause them to burst while baking.
- Watch the Time: Keep an eye on the oven as cooking times may vary, and you want them to be perfectly golden, not burnt.
- Flour the Surface: Always flour your surface and rolling pin to prevent the dough from sticking while rolling out.
- Experiment with Shapes: If you don’t have a skull cutter, feel free to use other themed cutters or simply make rounds!
Easy Variations
- Vegetarian Option: Load the skulls with vegetables like spinach, bell peppers, and mushrooms for a meatless version.
- Different Cheeses: Swap mozzarella with other cheeses like cheddar, gouda, or a spicy pepper jack for varied flavor.
- Herbed Dough: Knead dried herbs like oregano or basil into the dough for an extra layer of flavor.
- Sweet Fillings: For a fun twist, fill the skulls with sweet ingredients like chocolate or fruit jam for dessert versions.
What to Serve with Spooky Pizza Skulls
- Garden Salad: A fresh salad provides a nice contrast to the richness of the pizza skulls and balances the meal.
- Garlic Bread: Serve alongside garlic bread for a classic, comforting pairing.
- Veggie Platter: Offer a colorful selection of raw vegetables and dips to brighten up the table.
- Pumpkin Soup: A warm, creamy pumpkin soup can enhance the Halloween theme and complement the flavors of the pizza skulls.
Storage and Reheating
- Refrigerator Storage: Store leftovers in an airtight container in the refrigerator for up to 3 days.
- Freezer Storage: For longer storage, freeze the skulls arranged in a single layer, then transfer to a freezer bag. They will keep for up to 2 months.
- Reheating Method: Reheat in a preheated oven at 350°F (175°C) for about 10-15 minutes, or until heated through and crispy.
- Texture Preservation: Avoid microwaving as it can make the dough soggy; oven reheating keeps them crisp.
Common Mistakes to Avoid
- Inadequate Sealing: Failing to seal the edges well can lead to spillage. Ensure a tight seal using fingers or a fork.
- Over Baking: Monitor baking closely to avoid drying out the skulls; look for a golden brown color.
- Too Many Fillings: Adding excessive fillings can cause the skulls to burst during baking. Stick to a small spoonful.
- Skipping the Oil: Not brushing with olive oil can result in pale, less flavorful skulls. Don’t skip this step!
Spooky Pizza Skulls: Background & Cultural Inspiration
Spooky Pizza Skulls combine the festive spirit of Halloween with the universal love for pizza. Halloween traditions, rooted in ancient Celtic festivals, celebrate the change of seasons and gratitude for the harvest. The custom of making themed foods has evolved, with these pizza skulls offering a playful nod to classic Halloween imagery. Incorporating familiar flavors of pizza with a haunting twist makes this recipe a favorite for parties and gatherings, while encouraging creativity in the kitchen.
Frequently Asked Questions
Can I use store-bought pizza sauce?
Absolutely! Store-bought pizza sauce can save time and still tastes great. Feel free to customize it with herbs and spices if desired.
Can I prepare these skulls ahead of time?
Yes, you can prepare the skulls and keep them refrigerated until ready to bake. Just be sure to bake them fresh for the best texture.
How spicy are these pizza skulls?
The spice level depends on the toppings you choose. Traditional pepperoni is mild, but feel free to use spicier sausage or pepper jack cheese for a kick.
What if I don’t have a skull cutter?
Use any shapes you have on hand! Round or square cutters work well, or you can simply cut the dough into other shapes like ghosts or pumpkins.
How many skulls does this recipe make?
This recipe yields about 12 skulls, depending on the size of your cutter and how thickly you roll the dough.
Final Thoughts
Spooky Pizza Skulls are a creative way to celebrate Halloween with an enjoyable and delicious twist on the classic pizza. They’re simple to make, perfect for sharing, and most importantly, fun! Whether you’re hosting a Halloween party or just want to surprise your family with a special dinner, give this recipe a try—you won’t be disappointed!